Ok, let me explain.
First of all, and unrelated to my work, I will be moving house soon and being a daydreamer and totally over excited by the idea of my own place, really wanted to create a Japanese space within my new home. Tatami are the woven igusa grass floor mats that traditionally carpet their floor spaces, and are a particular size and shape (except for special sizes such as half mats or mats designed for a very specific floor use), to the extent that rooms in Japan have traditionally been measured by the number of tatami it takes to cover the floor. They have a rather lovely fresh sweet scent and firm smooth texture, and the room I stayed in while in Tokoname used them.
Originally I found a company in the UK that would make tatami mats custom for the shape of any English room (
http://www.tatamiuk.co.uk/index.html), but was quickly brought down to earth with a bump on the realisation that this was going to be horrendously expensive, and it was unlikely that when selling the house on that anyone else would be impressed. So I settled for trying to find a loop pile carpet that looked woven and dropped the idea.

Tatami mats ^
Berber carpet >
However, and secondly, I am now at the stage of planning my degree show exhibit, so was searching for inexpensive igusa grass floor coverings.
Previously this year I had my first solo show entitled "Liquid", held at Creative Framing in Chapel Ash, based around the idea of the natural fluid properties of porcelain and tea, and the use of water in the forming of the clay and the use of the objects. It also aimed to reunite art and function, which in this country seem to have been separated into the categories of fine art and craft (check out Joanna Howells article on the topic, it's really interesting:
http://www.joannahowells.co.uk/images/writing/TWWLN%20article%20CR.pdf), but in Japan are intrinsically fused. This is especially true in the tea ceremony, which my work is based on. In 'Liquid' I tried to recreate the atmosphere of a tea house and tea ceremony by serving tea in a ritualistic way (as close as I could get it to an actual tea ceremony while using an electric kettle and not being qualified!) and setting the gallery up to look and feel as Japanese as possible. I even made a soundtrack of what Japan sounds like (mainly bird calls and sporadic Japanese flute with a shrine gong thrown in for good measure). The different works were set up either to encourage or discourage people to touch them to try and get them to question their preconceptions about how we interact with art.

The camera didn't like the light in the gallery! Anyway, there were pieces on the wall which looked merely decorative and positioned well back to discourage touching, then pieces on pedestals, as in museums, which generally discourage touch, but then were very accessible and look extremely tactile to encourage touching, and then the pieces in the centre used for serving tea were given to guests to hold and use during their visit.
Set up for a ceremony with matcha cake and mochi in a bowl for guests.
Artist/master of ceremonies
Complete with authentic electric kettle! However I was very lucky to find a gallery with alcoves, textured walls, woven flooring and wooden rafters in the ceiling to use as my setting.
Overall the exhibition worked very well and I really enjoyed it, so I wanted to base the exhibit at the degree show on this and share it with more people. This time though, I will be going even further and constructing a custom tea house!
And here we come back to the tatami mats. Generally the smallest tea houses have rooms that are three tatami mats big (a tatami is usually about 180cm by 90cm), such as the one built for the British Museum in their Japan gallery tucked right at the top of the building, but there are also tinier ones at just two tatami mats big, and this is what I'm looking at constructing.
 |
| Tatami mat layouts for tea houses - the pale rectangles/squares represent tatami |
This is because I do not want it to exceed a space larger than 2 metres by 2 metres, as it will be in a group exhibition where other people will need enough room as well. I cannot find the dimensions for it, but I think it would be a similar size to the 'Beetle House' designed by Terunobu Fujimori for
1:1 – Architects Build Small Spaces.
I was lucky enough to be able to visit this tea house while it was in situ at the V and A Museum in London. It was a very spartan space, but lovely to sit in as it is so intimate, and being separated from its surroundings on all sides by air, felt a bit like its own universe and a wonderful hideaway. The childlike side of me was celebrating its den like qualities - the simplicity of the interior also helped here, as it makes it a blank canvas for the mind to make it whatever it wants. I want my own tea house to have an element of intimacy and escapism like this, where my guests' imagination can take over their reality for a bit.
Here is the designer talking a little about his creation:
Here are a couple more two tatami tea houses to give an idea of how the space might work
This size of space could probably accommodate two guests and a hostess, possibly three at a push. At the original exhibition I never ended up serving more than three at once, so this should be fine and will keep the experience intimate.

The other thing I have been looking for, and the moving house has helped with this, is wall coverings for the tea house. Japanese walls have a very rustic, natural look, and the room I stayed in in Japan was made of a kind of rough chipboard with gold flecks in so that it caught the light. Most traditional Japanese interiors feature dark natural neutrals and natural textures. Most museums displaying Japanese artefacts use linen covered backdrops and plinths to echo this, like this example from the British museum. I visited the tea house in the British Museum yesterday to have a look at the layout and materials used in the construction (so actually it turns out I didn't take any good images of the overall structure - woops).

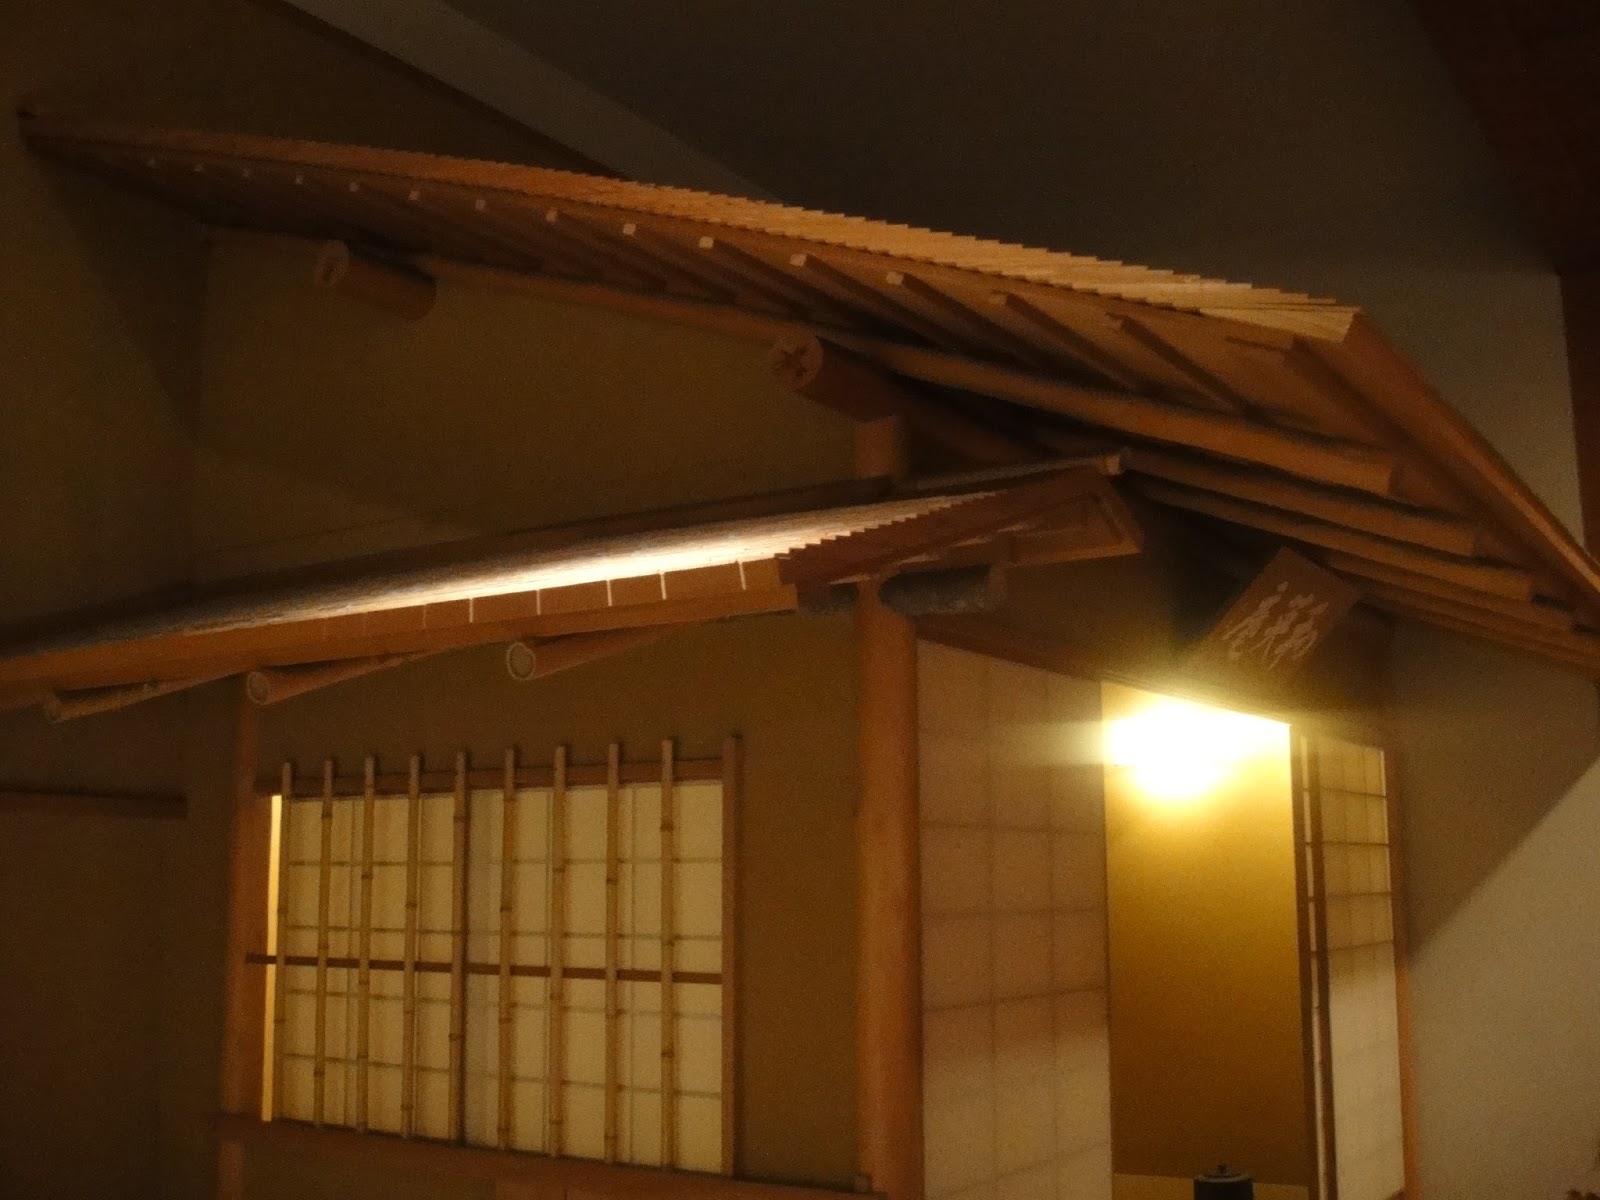
So looking at the overall structure, the roof is made from wood shingle with a mixture of cut wood supports underneath and bamboo rafter and supports, with the odd bark covered branch used as a feature main beam. The variation in simple materials helps to break up the structure and monotony of the roof which looks pretty cool. The wall is a rather weird dark sand colour with a rough sandy texture and the windows are thick shoji paper with wooden and bamboo slats.


You can see the tokonoma here on the far left, the alcove built into the room for displaying artworks, usually a display of ikebana (flower arranging) and a scroll, maybe the odd treasure used in the tea ceremony. The guests would sit next to this. On the right you can see the tea master's entrance, right behind the area laid out for serving the tea. The door should lead to a preparation room out of site of the guests. You can see the three tatami mat layout on the floor, and the interesting mash up of different ceiling structures and wall panels.
The tokonoma floor is a little bit raised and sectioned off with a narrow log, and gets it's own mini tatami mat floor, although I've seen ones in Japan using polished wood. There's a kind of wood edging or frame all around the edges of the panels.
This mysterious rock is just underneath a small sliding hatch situated low in the wall.
Layers of criss crossing lattices of different thickness's and wood types. Any nails used are very discreet, binding and slotting is much more prominently used and has become a feature. This is a porch roof over the wall with the hatch in.

When I got back I found this diagram online, and this helped explain a few things about the tea house I'd just seen. The first of them being that the hatch and the rock are in fact the entrance to the tea house, known as the crawl door, and designed to humble the guests at the tea ceremony. The guests were historically often very important people with lots of power over other people's fates, so tea masters liked to give them a sense of humility. The big opening on the museum tea house is in fact the window to allow the guests to appreciate the garden while they drink.
I've also managed to find a website selling Japanese wall coverings. It turns out the sandy texture is actually a clay plaster. I think I will just pass and mix clay and sand with paint and use that.
Anyway, I'm now getting on with my wall paper samples and designing the structure for my own mini tea house! Sorry for the long rambling post, but watch this space!